Pages

Showing posts with label Detail. Show all posts

Thursday, 14 February 2013

[ORCHIDS] WIP of Paphiopedilum glaucophyllum

Starting to work on the Paphiopedilum glaucophyllum illustration yesterday, I met new challenges.

I have never painted on ±A2 (38 x 56 cm) sized paper beforehand. This "big" size format requires me to buy new stretch boards and to find comfortable positions to paint. With my small table easel, it is hard to feel comfortable (believe me) especially for someone with a big "38 weeks" belly. I stood, but quickly felt worn out. Then I put the easel lower on another chair so I can sit while painting. It is better but I feel stuck when I want to lean forward to work on the details. What a challenge, isn't it? :p

Another challenge was when I found my specimen lost its flower buds and two munching caterpillars nicely sat on the leaves. I was so broken-hearted for the flower buds. But I moved on to paint the glossy orchid leaves, which is something new for me! If you notice, I hardly painted any leaves. Thanks to the caterpillars I do now.


To paint the glossy leaves I use wet on wet washes a lot. I also try to apply subtle bluish highlight as I saw on Katty Pickles's wonderful botanical works. It was not done yet, but today's progress (especially the leaves) lifted up my spirit :)


Tuesday, 9 October 2012

Sunday, 23 September 2012

[TIPS] Chrysanthemum: A Touch of Dry Brush


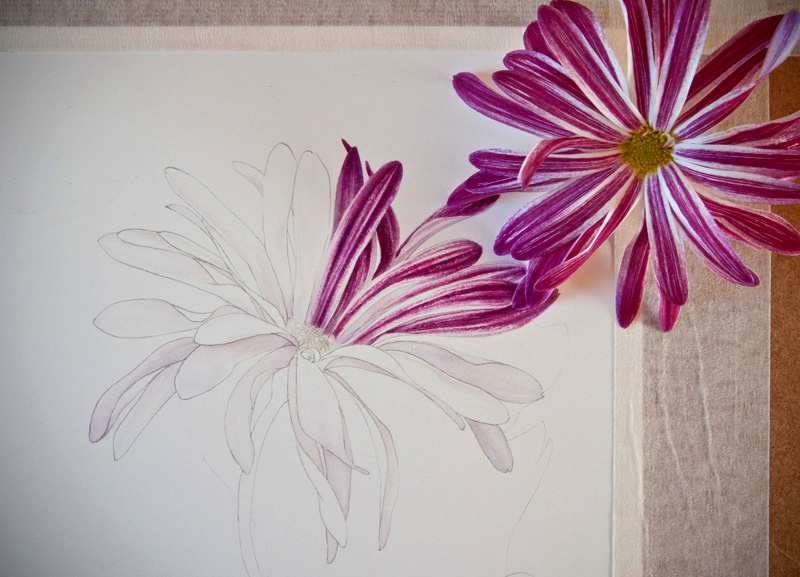
Wet in wet and glazing are watercolour techniques I use the most, but sometimes an object requires a different technique. This Chrysanthemum flower has hard edged/ broken pattern with striking colour on each petal. For it, I need a touch of dry brush technique.

Dry brush is the opposite technique to 'wet in wet'. It involves more pigment, less water and a completely dry paper.

My tips:
1. Make sure the paper and the background colours completely dry.
2. Make a fairly dark mix with just a little water.
3. Load the brush and use kitchen roll/ tissue paper to remove excess fluid.
4. Flatten the end of the brush to separate its hairs slightly.
5. Drag the brush along the area you want then gently lift it off before the end.
6. To have a fully patterned petal's tip, use paper or masking fluid to cover white paper.
7. Establish the wanted effect (e.g. scratchy look) on other paper. It is good to exercise a just pressure and dryness. Once you get what you want, work on the actual piece.

Saturday, 15 September 2012

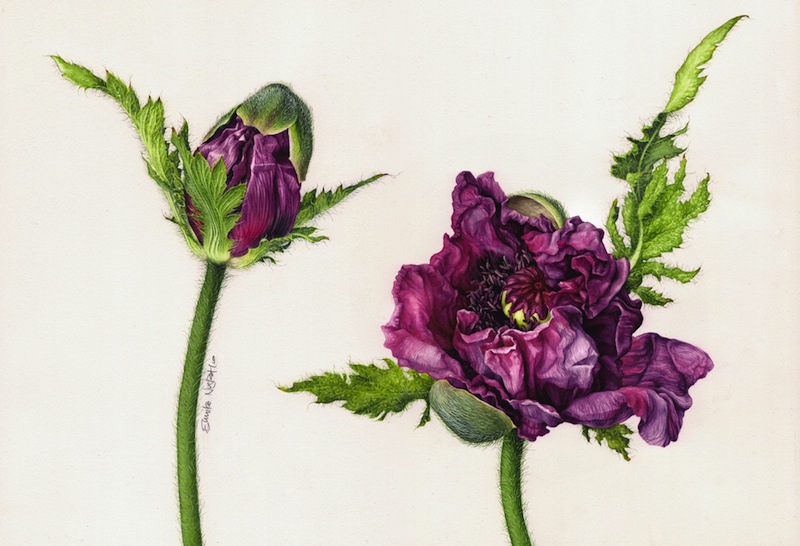
Oriental Poppies: Zoom it in!

Yesterday I read Mattias's blog and found a feature to see the details of his work. Very cool! I made it for my Oriental Poppies.

Just ZOOM in on it to see the details :)


P.S. I don't have to share a huge file to let anyone enjoy my work with all the details anymore. What I need to do is just keeping the big file in a dropbox folder in my computer (or flickr, or any server you like) then giving the link to Zoom.it. Zoom it will do the rest and you can share your work excellently. Enjoy! :)