

Showing posts with label Plant. Show all posts
Showing posts with label Plant. Show all posts
Tuesday, 21 May 2013
[ORCHIDS] Study sketch of Vanda arcuata
Vanda arcuata from Northern Sulawesi, Indonesia. I made the sketch bigger than the life size, easier for me to paint the pattern.


Tuesday, 29 January 2013
[SKETCHBOOK] Gembira Loka Zoo


Monday, 7 January 2013
[SKETCHBOOK] Pigeon Orchids

 Yesterday, the pigeon orchids at our residence bloomed.
They smelled so good but, too bad, the flowers withered
in a day.
Since I want to make botanical artworks of Indonesian
orchids during my stay in Yogyakarta, I took this available
specimen for a rehearsal. I made a study sketch on it.
I found that I need to understand, not only how to paint,
but the plant itself. I felt ashamed that as an Indonesian
I know nothing about orchids whereas Indonesia is one
of the world's richest country of orchids species.
I hope I can manage my time between the project
and my pregnancy. *fingers crossed :)
Tuesday, 2 October 2012
[TIPS] Cherry Blossom: The Fear of Masking Fluid
Last week, I and a friend, a wonderful botanical artist, had a
chat.
She was working on an illustration of lovely streaked red-yellow apples
with light brown spots spread over the fruits. When I saw her specimen, I
immediately thought of using masking fluid for the light brown spots,
but
she said she was afraid of using it since masking fluid tends to ruin
her works. A few years ago, I will say the same. Using masking fluid
is an easy way to leave detailed or intricate white spaces but it can
also ruin my hard work when applied inappropriately.
How to avoid masking fluid from ruining your work?
 1. Masking fluid is not suitable for regular paper, such as cartridge paper, regular sketchbook, Padalarang
paper, etc. These papers would be peeled off when I removed
the masking. Test the masking fluid on the watercolour paper before
applying to a real painting. I found that I need to be more careful with
cold-pressed paper than hot-pressed one when rubbing masking fluid.
1. Masking fluid is not suitable for regular paper, such as cartridge paper, regular sketchbook, Padalarang
paper, etc. These papers would be peeled off when I removed
the masking. Test the masking fluid on the watercolour paper before
applying to a real painting. I found that I need to be more careful with
cold-pressed paper than hot-pressed one when rubbing masking fluid.
2. Masking fluid must be applied
to a perfectly dry paper and removed only when a painting is completely dry. The wrong choice of time in applying/removing masking fluid is the main reason of ruining a work.
3. Never use a fine brush! I use my inexpensive synthetic brush (actually I got it free from buying a watercolour pencil set) or a dip/ ruling pen.
4. Dip the brush into liquid dish soapy water,
rinse slightly and then wipe it before and after using the masking
fluid. I used to ruin my brushes with masking fluid but since I treat the brush regularly and repeat the soap step before applying more masking, I never clog my brushes anymore.
5.
Make sure the masking fluid is completely dry before putting a paint or
glazing the
paper. Be careful with thick masking fluid, it may look dry on the
outside
but wet inside, the brush's pressure can scrape the paper and spread the
fluid out. Masking fluid will be more transparent once it's dried.
6. From a completely dry painting/paper, gently remove masking fluid by rubbing it off with dry and clean fingers or rubber eraser. Be careful with a greasy finger, it can smear paint onto the newly uncovered area.
7. Pat down the painting to make sure all the masking fluid removed. I check any missed spots by running my fingers lightly across the paper surface.
7. Pat down the painting to make sure all the masking fluid removed. I check any missed spots by running my fingers lightly across the paper surface.
Masking
fluid made my painting process on this Cherry blossom much easier.
The masking retained the tiny white area of the stamens and carpels of
the flowers while I was painting the other area freely, putting darker
shadow or making patterns and veins. For this painting, I used Winsor
& Newton masking fluid. You can read on another post about the brand of
masking fluid I use HERE.

I used Fabriano Artistico hot-pressed paper and let the masking stay for about a week without any trouble removing it.

Tuesday, 25 September 2012
[WIP] Japanese Chrysanthemum
Taking longer time than I thought before. I've already started painting the Japanese Chrysanthemum in my spare time for these 2 -3 days and seem it won't be finished soon.

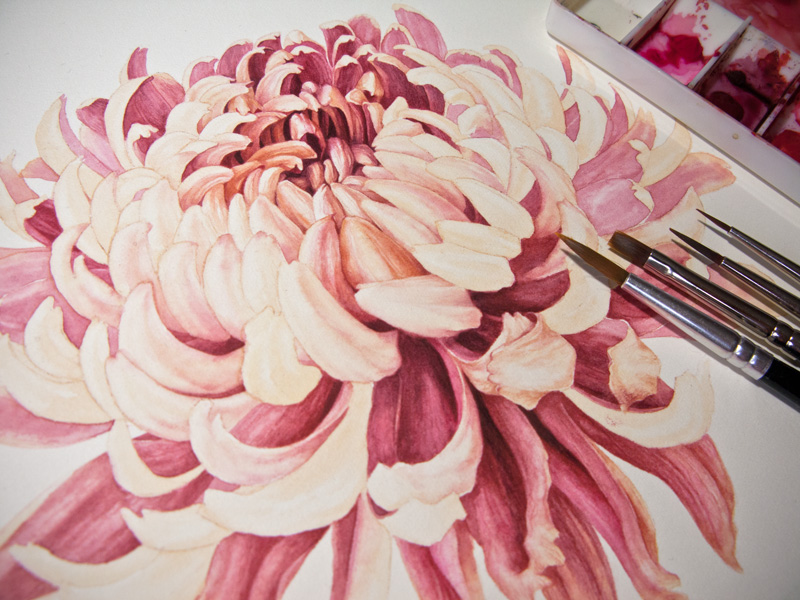
The red mixes were Permanent Rose, Opera Rose, Quinacridone Red, Cadmium Yellow Pale and a lil amount of French Ultramarine.
Previous post: The Sketch
Previous post: The Sketch
Sunday, 23 September 2012
[TIPS] Chrysanthemum: A Touch of Dry Brush
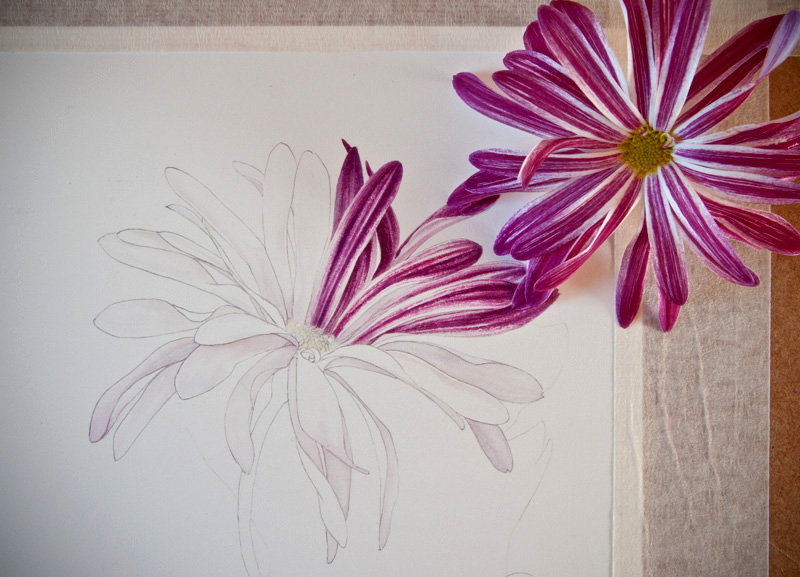
 Wet in wet and glazing are watercolour techniques I use the most, but sometimes an object requires a different technique. This Chrysanthemum flower has hard edged/ broken pattern with striking colour on each petal. For it, I need a touch of dry brush technique.
Dry brush is the opposite technique to 'wet in wet'. It involves more pigment, less water and a completely dry paper.
My tips:
1. Make sure the paper and the background colours completely dry.
2. Make a fairly dark mix with just a little water.
3. Load the brush and use kitchen roll/ tissue paper to remove excess fluid.
4. Flatten the end of the brush to separate its hairs slightly.
5. Drag the brush along the area you want then gently lift it off before the end.
6. To have a fully patterned petal's tip, use paper or masking fluid to cover white paper.
7. Establish the wanted effect (e.g. scratchy look) on other paper. It is good to exercise a just pressure and dryness. Once you get what you want, work on the actual piece.

Tuesday, 3 April 2012
A Drawing Class with Sarah Simblet
In April 2012, I was fortunate to join Sarah Simblet's drawing class. It was held by the Florilegium Society in Sheffield Botanical Garden. Sarah brought with her plenty of interesting insights, hilarious stories during her books making and her original drawings. They are so lively, detailed and precise. Her book, 'Botany for Artist', is a great guide to draw anatomically correct for any botanical artist.


Subscribe to:
Posts (Atom)