By keeping the watercolour paper clean, I can sketch and revise as many as I want, for example, to accommodate the client's requests. Sketching directly on the "real" paper will leave too many erases and pencil scratches on the otherwise good watercolour paper. The other advantage is that I can transfer the sketch already coloured, or only necessary lines.
Here are the tools I need:
1. Tracing papers
2. Pencils or water soluble colour pencils to coat the other side of paper
3. A very pointy and hard pencil (e.g. 2H - 4H) to trace the drawing
4. (Optional) Eraser, pencil sharpener, kitchen towel, sandpaper.
And here are the steps:
 1. Once a sketch was approved by client, I scanned and then printed it on a tracing paper. Again, it saved me another time from transferring a drawing twice from sketch pad to a tracing paper then to a watercolour paper. It was also less messy because it prevented me from smearing the watercolour paper with pencil dust that clings on my palm. Another tips to avoid pencil dust: Place clean paper between your hand and tracing paper if you aren't going the scan-print route.
 2. To coat the blank side of the tracing paper quickly, I held the pencil almost completely sideways then spread the mark with a kitchen towel. This helped me to gain an even outline like I draw directly on the watercolour paper with 2H pencil.
My tips: For delicate botanical illustration or light coloured object, use water-soluble colour pencils with similar colours to those of the final paints to coat the backside of the tracing paper. This would save you some time from erasing it as it leaves no trace of pencil. On the other hand, when I paint less detailed or dark coloured object, I use graphite pencil to coat the backside as I did in this Asian palm civet illustration.
3. I placed the tracing paper on top of a watercolour paper and secured it with masking tape before I traced the image with very pointy 4H pencil. I trace only necessary outline to the watercolour paper and I did it with a steady pressure.
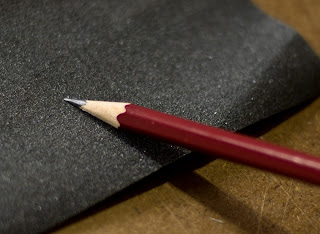
My tips: Grind the pencil to sandpaper almost completely sideways to keep it very sharp/pointy.
4. After I had completed tracing the drawing, I gently removed the tracing paper and drew necessary line for the missing part. And the watercolour paints were ready to GO!


